This post may contain affiliate links which means I will get a commission if you make a purchase at no additional cost to you. As an Amazon Associate I earn from qualifying purchases. Please read my disclosure for details.
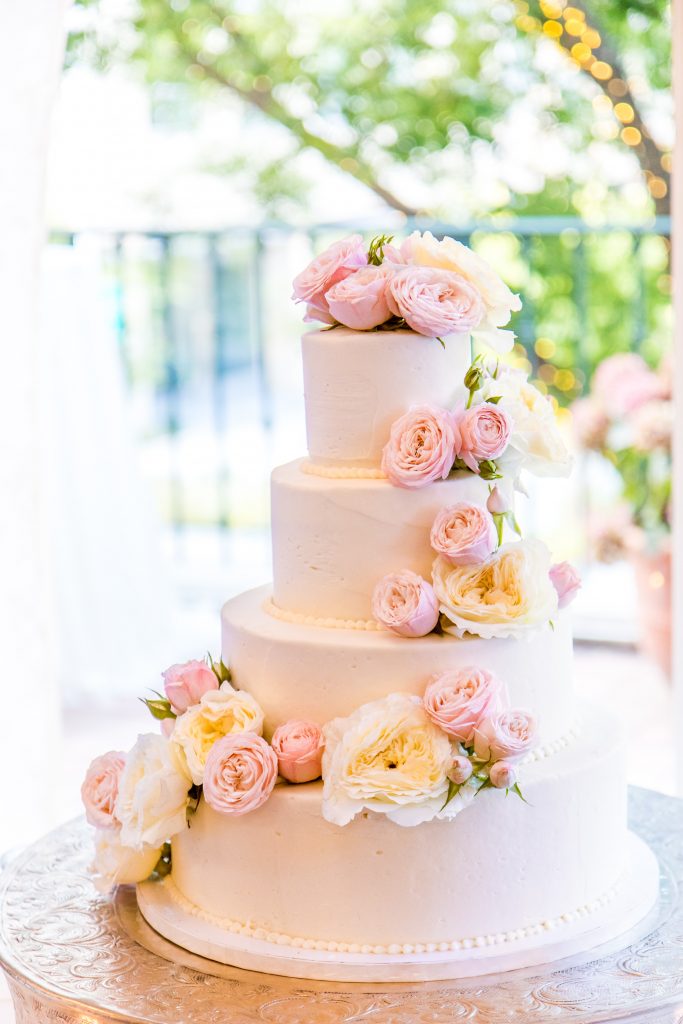
Some occasions simply call for a tall cake. Don’t get us wrong, one layer cakes are delicious too, but sometimes one or two layers will simply not suffice.
Baby showers, weddings, and celebrations are worth going the extra mile for, which is where the tall cake comes in.
An ambitious baking feat, tall cakes can often be mistaken as an easy-to-make treat. Unfortunately, this could not be more wrong and there are a few tips and tricks to remember when taking a tall cake on.
That’s where our article comes in – we’ve collated the best techniques for making a tall cake all in one article so that you no longer have to wing it and hope for the best. Let’s get cooking, shall we?
WANT TO SAVE THIS RECIPE?
What To Know Before You Start
Do: Use a Reliable Support System
Tall cakes need a little help to remain upright, so make sure that you have enough boards and dowels in the cupboard. Cake boards don’t have to be expensive, in fact, you can actually make them out of clean cardboard if you’re baking on a budget! Simply cut out round cardboard bases that are around a centimeter smaller in diameter than your cake layers.
The dowels are sticks that are pushed vertically down into the cake layers to keep them perfectly aligned with one another. These are very inexpensive and can either be made from wood or plastic. They should be able to be chopped to the correct height without leaving you with a sharp edge that could hurt one of your guests.
Don’t: Stack Layers and Hope for the Best
The more layers of the cake you stack upon one another, the more weight will be pushing down on the bottom layer. This will not only change the consistency of the cake and make it denser and less airy, but it might also cause the cake to become unstable on its foundation layer.
If the foundation begins to lean slightly to the side, the rest of the layers will quickly follow suit and begin to slide from their original positions. If left unattended, the cake could fall apart easily and ruin the hours of hard work that you put into your baking. To avoid this, use cake boards and dowels that we mentioned above.
Making a Tall Cake
Supplies Needed
- Layers of your favorite flavor cake, from 4 to 6 even layers. They should be the same width and diameter.
- Cake leveler.
- Cake base made from high-density foam.
- Cake boards, made from cardboard or plastic.
- Candy melts to act as a glue.
- Buttercream or icing.
- A cake stand.
- Icing tools.
- Plenty of dowels, preferably ones that can be cut to size.
- Center dowel that is more durable than the rest.
- Edible marker pen.
- A knife.
- The rest of your decoration supplies.
A Step-by-Step Guide on Making Tall Cakes
Phew, that seems like a lot of supplies needed! If you’re currently worrying that you might have taken on more than you can chew, don’t worry.
We’re here to make the method as simple and easy to follow as possible for you.
Step One
Take the layers of your cake and level them to ensure that they’re all the same height as one another. This will prevent them from sliding off due to risen centers.
Take your cake base and center it on the cake turntable, spreading a small number of melted candy melts to the middle of the cake board. Add the first cake board and wait a few minutes for the candy melts to set.
Step Two
Add some more melted chocolate onto the cake board and add the first layer of cake. Add buttercream to the top of the cake, sandwich it with another layer of cake, and repeat until you’ve got two or three cakes stacked together.
This is the bottom tier of your tall cake.
Step Three
Take a leveler and ensure that the cake is completely level. If not, take a cake board and push down on either side of the cake until it measures as level.
Once you’re happy with the foundation, remove the cake board, and add some buttercream.
Step Four
Now it’s time for the dowels. Take one dowel and insert it into the cake layers. Once it reaches the cake board, mark the top with an edible marker pen so that you have the right measurement. Remove the dowel carefully and cut it to size, along with the rest of the dowels for that tier.
Use one dowel for every two inches of cake. For example, a six-inch cake should have three dowels, a ten-inch cake should have five, and a twelve-inch needs six. Cut the right amount of dowels to size and insert them into the cake layers as straight as possible. Add these in a circular shape avoiding the center of the cake.
Step Five
Add another cake board and make sure that the cake is level once more. If not, make the necessary adjustments to ensure that it is. Add some more candy melts to the cake board and layer on the next cake layer.
Just as before, buttercream and layer more cake until you’ve reached the desired height.
Step Six
Level the cake again. Measure the center dowel alongside the cake to get an accurate measurement of where you need to cut it. Make sure that the center dowel is long enough to travel through the entire cake as well as the cake board. Sharpen one end of the dowel once it’s cut to size and push it through the cake.
You’ll need quite a lot of force to get it through the cake boards and base, but don’t give up until it’s all the way in there. Some people find it beneficial to hammer the dowel into the cake if you cannot do it with just your hands.
Step Seven
After all that hard work, it’s time to give the cake a break. Allow it to chill in the fridge for up to half an hour before you get on with decorating it. Add a final cake board to the top of the cake and ensure that its level. Now go around the sides of the cake and make sure that they’re all level and straight.
Once you’re happy with the shape, decorate with buttercream or icing, and whatever fancy materials you’ve got left! Enjoy the look on everyone’s faces once they see your amazing tall cake!